Tauri v2 with Next.js: A Monorepo Guide
Learn how to set up a monorepo using Tauri v2 and Next.js to build cross-platform applications for web, mobile, and desktop. This step-by-step guide covers everything from configuring Turbo Repo and shared components to deploying your apps.

Tauri v2 with Next.js
TL;DR
If you don't want to read the full article, here's the GitHub repository containing the complete code for a monorepo setup that combines Tauri v2 with Next.js. It's the perfect starting point for building cross-platform apps for web, mobile, and desktop.
Table of contents
Background
I'm currently collaborating with a friend on a translation app called Language.lol. Our goal is to create a cross-platform app that seamlessly works on web, mobile, and desktop while meeting the following requirements:
- React.js as the foundation: We want to leverage React.js since it's our area of expertise.
- Cross-device compatibility: The app must run smoothly on Web, iOS, Android, Windows, macOS, and Linux.
- Consistent UX/UI: A unified and polished user experience across all platforms is essential.
- Single codebase: Maintaining separate codebases for web, mobile, and desktop isn't an option.
- Native-like performance: Each platform's app should feel as fast and responsive as a native application.
Why choose Tauri?
I've been exploring different frameworks such as Expo, Electron, and Tauri. Each option has strengths and weaknesses, so I created a list of pros and cons to determine the best fit for our requirements.
Pros and Cons
Expo
- Mobile-first framework, perfect for iOS and Android apps.
- React Native ecosystem with a wide range of libraries and components.
- Hot reloading and over-the-air updates.
- Access to native APIs, such as camera, geolocation, and push notifications.
- Big community and extensive documentation.
- Mobile only, no support for web or desktop.There is support for web, but no official support for desktop.
- Expo-specific limitations and dependencies. Some native modules may not be available.
- Requires familiarity with React Native, which is slightly different from React.js.
- Limited customization and flexibility compared to other frameworks.
Electron
- Works on Windows, macOS, and Linux.
- Uses web technologies (HTML, CSS, JavaScript).
- Extensive ecosystem with plugins and tools.
- Mature framework with a large community and active development.
- Simplifies packaging and distribution for desktop apps.
- Resource-intensive, Electron apps bundle a full Chromium browser.
- Requires separate solutions for mobile.
- Steep learning curve for optimization and performance tuning.
Tauri
- Lightweight and fast. Minimal resource usage.
- Supports web, mobile, and desktop platforms.
- Performs close to native applications.
- Focused on security, with reduced attack surfaces and sandboxed webview environments.
- Rust powered backend. Fast and efficient backend, with access to native APIs.
- Easy to integrate with existing web projects.
- Relatively new framework, limited community and resources.
- Requires some knowledge of Rust for advanced features.
- Fewer plugins and tools compared to more established frameworks.
Why Tauri is the best choice for this project
After evaluating the pros and cons, we chose Tauri because it offers the best balance of performance, flexibility, and cross-platform support. It's lightweight nature ensures minimal resource usage, while it's integration with React.js allows us to maintain a single codebase for web, mobile, and desktop platforms. Tauri's focus on security and native-like performance makes it the ideal choice for our translation app, ensuring a consistent user experience across all devices.
How Tauri can be used with Next.js
Next.js is my go-to framework because of it's flexibility
and ease of use, having served me well in countless projects. It's server-side
rendering
(SSR)
capabilities ensure fast and efficient UI rendering, while creating API
endpoints is as simple as adding a route to the app/api directory.
When combined with Tauri, Next.js handles both the frontend and backend effortlessly. Tauri uses the Next.js API routes to communicate with the backend, allowing us to share logic and components between the web, mobile, and desktop apps.
Setting up the project
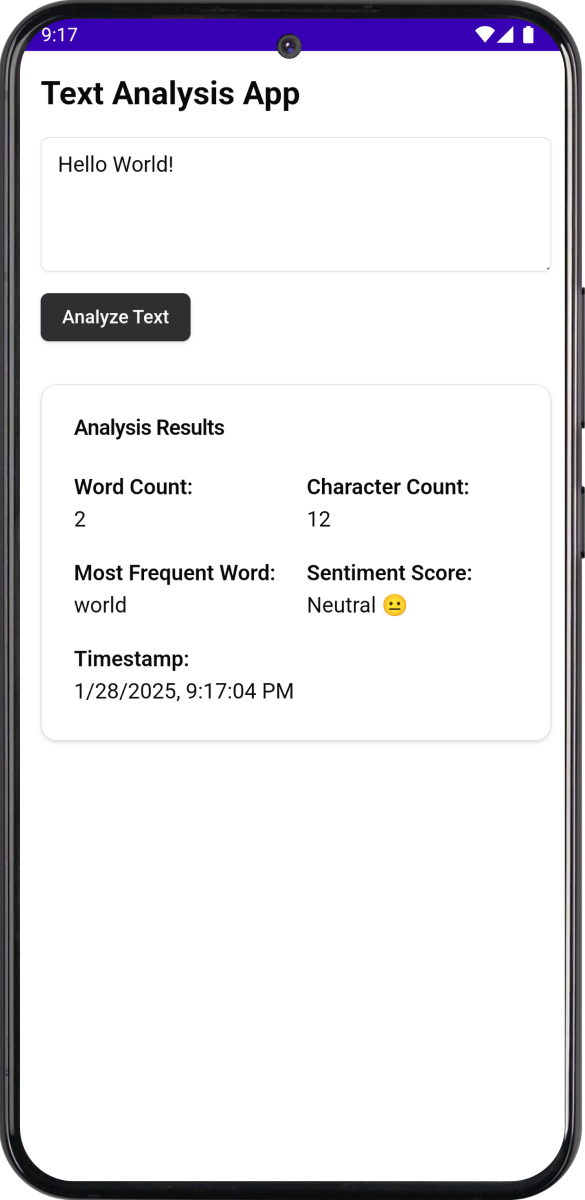
Now that we've decided on Tauri and Next.js, let's set up our monorepo project. For this guide, we will be building a simple text analysis app that shows the word count, character count, most frequent word, and the sentiment (positive, negative, or neutral) of the input text. At the end it will look like this:
Text Analysis App
Prerequisites
- Node.js (v22 or higher).
- pnpm installed globally.
- Rust installed on your machine.
- Optional: Xcode for iOS development.
- Optional: Android Studio for Android development.
Step 1: Initialize the monorepo
We'll use Turbo Repo to set up our monorepo. Turbo Repo is a powerful tool that simplifies the management of monorepos, making it easy to share code between projects and manage dependencies.
Get started by running the following commands in your terminal, this will create a new repository with Next.js and the necessary configuration files:
pnpm dlx create-turbo@latest

# Answer the prompts to configure your monorepo
>>> . Where would you like to create your Turborepo? > ./my-tauri-nextjs-monorepo
>>> . Which package manager do you want to use? > pnpm
Remove the default apps/docs directory:
rm -rf apps/docsUpdate turbo.json to add a clean task:
"tasks": {
  ...
  "clean": {
    "cache": false
  }
}
Add scripts to package.json for cleaning, type-checking and tauri CLI:
"scripts": {
  ...
  "clean": "turbo run clean",
  "check-types": "turbo check-types",
  "shadcn": "pnpm --filter @repo/ui shadcn",
  "tauri": "pnpm --filter native tauri"
}
Step 2: Setup Tauri
To integrate Tauri into your monorepo, navigate to the root directory and initialize a new Tauri project:
cd apps
pnpm create tauri-app

# Answer the prompts to configure your Tauri project
>>> . Project name > native
>>> . Identifier > com.my-tauri-nextjs-monorepo.app
>>> . Choose which language to use for your frontend > TypeScript / JavaScript
>>> . Choose your package manager > pnpm
>>> . Choose your UI template > React
>>> . Choose your UI flavor > TypeScript
Once the setup is complete, move the .vscode/extensions.json file from
apps/native to the root of your monorepo:
mv ./native/.vscode/extensions.json .vscode/extensions.jsonNext, install the necessary dependencies for the Tauri project:
cd ../
pnpm install
Add custom scripts to apps/native/package.json to streamline your workflow:
"scripts": {
  ...
  "clean": "rm -rf dist",
  "check-types": "tsc --noEmit",
}
Update the tsconfig.json file in the Tauri app to ensure compatibility with
the monorepo's TypeScript configuration:
{
  "extends": "@repo/typescript-config/base.json",
  "compilerOptions": {
    "module": "ESNext",
    "moduleResolution": "Bundler",
    "jsx": "react-jsx",
    "noEmit": true,
    "useDefineForClassFields": true,
    "allowImportingTsExtensions": true,
    "target": "ES2020"
  },
  "include": ["src"],
  "references": [{ "path": "./tsconfig.node.json" }]
}
Finally, install the TypeScript configuration package for the Tauri app:
pnpm add -D @repo/typescript-config --filter native --workspaceYour Tauri app is now set up and ready to integrate with the rest of the monorepo.
Step 3: Shared components
To maintain consistency across platforms, we'll create shared UI components that can be used in the web, mobile, and desktop apps. We'll use Tailwind CSS for styling, Lucide for icons, and Shadcn for component generation.
Start by cleaning up the packages/ui/src directory:
rm -rf packages/ui/src/*Update the packages/ui/package.json file to define module exports:
{
  ...
  "type": "module",
  "exports": {
    "./components/*": "./src/components/*.tsx",
    "./hooks/*": "./src/hooks/*.ts",
    "./lib/*": "./src/lib/*.ts",
    "./types/*": "./src/types/*.ts",
    "./views/*": "./src/views/*.tsx",
    "./globals.css": "./src/styles/globals.css",
    "./postcss.config": "./postcss.config.mjs",
    "./tailwind.config": "./tailwind.config.ts"
  },
  ...
}
Replace the tsconfig.json file in the ui package with:
{
  "extends": "@repo/typescript-config/react-library.json",
  "compilerOptions": {
    "outDir": "dist",
    "rootDir": "src",
    "baseUrl": ".",
    "paths": {
      "@repo/ui/*": ["./src/*"]
    }
  },
  "include": ["src"],
  "exclude": ["node_modules", "dist"]
}
Install the shared UI package in the Tauri app:
pnpm add @repo/ui --filter native --workspaceInstall Tailwind CSS and related dependencies:
pnpm add tailwindcss postcss autoprefixer tailwindcss-animate class-variance-authority clsx tailwind-merge lucide-react --filter @repo/ui
pnpm add tailwindcss postcss -D --filter web
pnpm add lucide-react --filter web
pnpm add tailwindcss postcss -D --filter native
pnpm add lucide-react --filter native
Add configuration files for Shadcn, Tailwind and PostCSS:
{
  "$schema": "https://ui.shadcn.com/schema.json",
  "style": "new-york",
  "rsc": true,
  "tsx": true,
  "tailwind": {
    "config": "tailwind.config.ts",
    "css": "src/styles/globals.css",
    "baseColor": "zinc",
    "cssVariables": true
  },
  "iconLibrary": "lucide",
  "aliases": {
    "components": "@repo/ui/components",
    "utils": "@repo/ui/lib/utils",
    "hooks": "@repo/ui/hooks",
    "lib": "@repo/ui/lib",
    "ui": "@repo/ui/components"
  }
}/** @type {import('postcss-load-config').Config} */
const config = {
plugins: {
tailwindcss: {},
autoprefixer: {},
},
};
export default config;import type { Config } from "tailwindcss";
import tailwindcssAnimate from "tailwindcss-animate";
import { fontFamily } from "tailwindcss/defaultTheme";
const config = {
darkMode: ["class"],
content: [
"index.html",
"src/**/*.{ts,tsx}",
"app/**/*.{ts,tsx}",
"components/**/*.{ts,tsx}",
"views/**/*.{ts,tsx}",
"../../packages/ui/src/components/**/*.{ts,tsx}",
"../../packages/ui/src/views/**/*.{ts,tsx}",
],
theme: {
extend: {
fontFamily: {
sans: ["var(--font-sans)", ...fontFamily.sans],
mono: ["var(--font-mono)", ...fontFamily.mono],
},
colors: {
border: "hsl(var(--border))",
input: "hsl(var(--input))",
ring: "hsl(var(--ring))",
background: "hsl(var(--background))",
foreground: "hsl(var(--foreground))",
primary: {
DEFAULT: "hsl(var(--primary))",
foreground: "hsl(var(--primary-foreground))",
},
secondary: {
DEFAULT: "hsl(var(--secondary))",
foreground: "hsl(var(--secondary-foreground))",
},
destructive: {
DEFAULT: "hsl(var(--destructive))",
foreground: "hsl(var(--destructive-foreground))",
},
muted: {
DEFAULT: "hsl(var(--muted))",
foreground: "hsl(var(--muted-foreground))",
},
accent: {
DEFAULT: "hsl(var(--accent))",
foreground: "hsl(var(--accent-foreground))",
},
popover: {
DEFAULT: "hsl(var(--popover))",
foreground: "hsl(var(--popover-foreground))",
},
card: {
DEFAULT: "hsl(var(--card))",
foreground: "hsl(var(--card-foreground))",
},
},
borderRadius: {
lg: "var(--radius)",
md: "calc(var(--radius) - 2px)",
sm: "calc(var(--radius) - 4px)",
},
},
},
plugins: [tailwindcssAnimate],
} satisfies Config;
export default config;Add shared utility functions in packages/ui/lib/utils.ts:
import { clsx, type ClassValue } from "clsx";
import { twMerge } from "tailwind-merge";

export function cn(...inputs: ClassValue[]) {
  return twMerge(clsx(inputs));
}
We will create a new script in the packages/ui/package.json file to easily add
components using Shadcn:
{
  ...
  "scripts": {
    ...
    "shadcn": "pnpm dlx shadcn@latest"
  },
  ...
}
Edit the apps/web/tsconfig.json and apps/native/tsconfig.json files to add
support for the shared UI package:
{
  ...
  "compilerOptions": {
    "baseUrl": ".",
    "paths": {
      "@/*": ["./*"],
      "@repo/ui/*": ["../../packages/ui/src/*"]
    },
    ...
  },
  ...
}
Add the Tailwind CSS configuration to the apps/web/next.config.ts and
apps/native/tauriconfig.ts files:
export * from "@repo/ui/tailwind.config";And add the PostCSS configuration to the apps/web/postcss.config.mjs and
apps/native/postcss.config.mjs files:
export { default } from "@repo/ui/postcss.config";In order to use Shadcn we need to add a components.json file to the web and
native apps. Create a new file apps/web/components.json and
apps/native/components.json with the following content:
{
  "$schema": "https://ui.shadcn.com/schema.json",
  "style": "new-york",
  "rsc": true,
  "tsx": true,
  "tailwind": {
    "config": "../../packages/ui/tailwind.config.ts",
    "css": "../../packages/ui/src/styles/globals.css",
    "baseColor": "zinc",
    "cssVariables": true
  },
  "iconLibrary": "lucide",
  "aliases": {
    "components": "@/components",
    "hooks": "@/hooks",
    "lib": "@/lib",
    "utils": "@repo/ui/lib/utils",
    "ui": "@repo/ui/components"
  }
}
Create shared styles in packages/ui/src/styles/globals.css:
@tailwind base;
@tailwind components;
@tailwind utilities;

@layer base {
  :root {
    --background: 0 0% 100%;
    --foreground: 240 10% 3.9%;
    --card: 0 0% 100%;
    --card-foreground: 240 10% 3.9%;
    --popover: 0 0% 100%;
    --popover-foreground: 240 10% 3.9%;
    --primary: 240 5.9% 10%;
    --primary-foreground: 0 0% 98%;
    --secondary: 240 4.8% 95.9%;
    --secondary-foreground: 240 5.9% 10%;
    --muted: 240 4.8% 95.9%;
    --muted-foreground: 240 3.8% 46.1%;
    --accent: 240 4.8% 95.9%;
    --accent-foreground: 240 5.9% 10%;
    --destructive: 0 84.2% 60.2%;
    --destructive-foreground: 0 0% 98%;
    --border: 240 5.9% 90%;
    --input: 240 5.9% 90%;
    --ring: 240 10% 3.9%;
    --chart-1: 12 76% 61%;
    --chart-2: 173 58% 39%;
    --chart-3: 197 37% 24%;
    --chart-4: 43 74% 66%;
    --chart-5: 27 87% 67%;
    --radius: 0.5rem;
    --font-sans:
      ui-sans-serif, system-ui, sans-serif, "Apple Color Emoji",
      "Segoe UI Emoji", "Segoe UI Symbol", "Noto Color Emoji";
    --font-mono: ui-serif, Georgia, Cambria, "Times New Roman", Times, serif;
  }
  .dark {
    --background: 240 10% 3.9%;
    --foreground: 0 0% 98%;
    --card: 240 10% 3.9%;
    --card-foreground: 0 0% 98%;
    --popover: 240 10% 3.9%;
    --popover-foreground: 0 0% 98%;
    --primary: 0 0% 98%;
    --primary-foreground: 240 5.9% 10%;
    --secondary: 240 3.7% 15.9%;
    --secondary-foreground: 0 0% 98%;
    --muted: 240 3.7% 15.9%;
    --muted-foreground: 240 5% 64.9%;
    --accent: 240 3.7% 15.9%;
    --accent-foreground: 0 0% 98%;
    --destructive: 0 62.8% 30.6%;
    --destructive-foreground: 0 0% 98%;
    --border: 240 3.7% 15.9%;
    --input: 240 3.7% 15.9%;
    --ring: 240 4.9% 83.9%;
    --chart-1: 220 70% 50%;
    --chart-2: 160 60% 45%;
    --chart-3: 30 80% 55%;
    --chart-4: 280 65% 60%;
    --chart-5: 340 75% 55%;
  }
}

@layer base {
  * {
    @apply border-border;
  }
  body {
    @apply bg-background text-foreground font-sans antialiased;
  }
}
Now you can generate shared components like button, card, and textarea
using Shadcn:
pnpm shadcn add button
pnpm shadcn add card
pnpm shadcn add textarea
With these shared components in place, you can create a consistent design system across all platforms.
Step 4: Next.js API setup
The Next.js app will serve as the backend for our app. We'll create an API route to handle text input and return analysis results such as word count, character count, most frequent word, and sentiment score.
Start by creating an API utility in the shared UI package:
export enum HttpStatus {
  OK = 200,
  CREATED = 201,
  BAD_REQUEST = 400,
  UNAUTHORIZED = 401,
  FORBIDDEN = 403,
  NOT_FOUND = 404,
  INTERNAL_SERVER_ERROR = 500,
}

export type ApiResponse<T, E = unknown> =
  | { success: true; data: T; error?: never }
  | {
      success: false;
      data?: never;
      error: { code: string; message: string; details?: E };
    };

export class ApiError extends Error {
  constructor(
    public statusCode: number,
    public code: string,
    message: string,
    public details?: unknown,
  ) {
    super(message);
    this.name = "ApiError";
  }
}

export function createResponse<T>(data: T, status = HttpStatus.OK): Response {
  if (data === undefined || data === null) {
    throw new Error("Response data cannot be null or undefined");
  }

  const body: ApiResponse<T> = {
    success: true,
    data,
  };

  return Response.json(body, {
    status,
    headers: {
      "Content-Type": "application/json",
      "Cache-Control": "no-store",
    },
  });
}

export function createErrorResponse(error: Error | ApiError): Response {
  const apiError =
    error instanceof ApiError
      ? error
      : new ApiError(
          HttpStatus.INTERNAL_SERVER_ERROR,
          "INTERNAL_SERVER_ERROR",
          "An unexpected error occurred",
        );

  const body: ApiResponse<never> = {
    success: false,
    error: {
      code: apiError.code,
      message: apiError.message,
      details: apiError.details,
    },
  };

  return Response.json(body, {
    status: apiError.statusCode,
    headers: {
      "Content-Type": "application/json",
      "Cache-Control": "no-store",
    },
  });
}

export function isSuccessResponse<T, E>(
  response: ApiResponse<T, E>,
): response is ApiResponse<T, E> & { success: true } {
  return response.success === true;
}

export async function parseApiResponse<T, E = unknown>(
  response: Response,
): Promise<ApiResponse<T, E>> {
  const data = await response.json();
  if (!response.ok) {
    const error = data.error || {
      code: "UNKNOWN_ERROR",
      message: "Unknown error occurred",
    };
    throw new ApiError(
      response.status,
      error.code,
      error.message,
      error.details,
    );
  }
  return data as ApiResponse<T, E>;
}
Define the types for text analysis results:
export interface TextAnalysisResult {
  id: string;
  timestamp: string;
  analysis: {
    wordCount: number;
    charCount: number;
    mostFrequentWord: string | null;
    sentimentScore: number;
  };
}
Add Zod, a TypeScript-first schema declaration and validation library, to the Next.js app dependencies:
pnpm add zod --filter webWe also need to add natural, a general natural language facility for Node.js, to the Next.js app dependencies:
pnpm add natural mongoose pg --filter webUpdate the Next.js configuration to include CORS headers:
import type { NextConfig } from "next";

const nextConfig: NextConfig = {
  transpilePackages: ["@repo/ui"],
  // This is needed to support CORS headers for the API
  async headers() {
    return [
      {
        source: "/api/text-analysis",
        headers: [
          { key: "Access-Control-Allow-Credentials", value: "false" },
          { key: "Access-Control-Allow-Origin", value: "*" },
          { key: "Access-Control-Allow-Methods", value: "POST" },
          {
            key: "Access-Control-Allow-Headers",
            value:
              "Accept, Accept-Version, Content-Length, Content-MD5, Content-Type, Date",
          },
        ],
      },
    ];
  },
};

export default nextConfig;
Create the API route for text analysis:
import { z } from "zod";
import natural from "natural";
import {
  ApiError,
  HttpStatus,
  createResponse,
  createErrorResponse,
} from "@repo/ui/lib/api";
import { TextAnalysisResult } from "@repo/ui/types/text-analysis";

// Define the schema for validating the input using Zod
const InputSchema = z.object({
  text: z
    .string()
    .min(1, "Text input cannot be empty")
    .max(10000, "Text input exceeds the maximum allowed length"),
});

export async function POST(request: Request) {
  try {
    const body = await request.json();

    // Validate the input using Zod
    const result = InputSchema.safeParse(body);

    if (!result.success) {
      const errorMessage = result.error.errors
        .map((err) => err.message)
        .join(", ");
      throw new ApiError(
        HttpStatus.BAD_REQUEST,
        "VALIDATION_ERROR",
        errorMessage,
      );
    }

    // Extract validated input
    const { text } = result.data;

    // Initialize tokenizer and analyzer
    const tokenizer = new natural.WordTokenizer();
    const words = tokenizer.tokenize(text);

    // Calculate word and character counts
    const wordCount = words.length;
    const charCount = text.length;

    // Sentiment analysis using natural
    const analyzer = new natural.SentimentAnalyzer(
      "English",
      natural.PorterStemmer,
      "afinn",
    );
    const sentimentScore = analyzer.getSentiment(words);

    // Find the most frequent word
    const mostFrequentWord = findMostFrequentWord(words);

    const response: TextAnalysisResult = {
      id: Math.random().toString(36).substring(7),
      timestamp: new Date().toISOString(),
      analysis: {
        wordCount,
        charCount,
        mostFrequentWord,
        sentimentScore,
      },
    };

    return createResponse(response);
  } catch (error) {
    return createErrorResponse(error as Error);
  }
}

// Helper function to find the most frequent word
function findMostFrequentWord(words: string[]): string | null {
  if (words.length === 0) return null;

  const frequencyMap: Record<string, number> = {};
  words.forEach((word) => {
    const normalizedWord = word.toLowerCase();
    frequencyMap[normalizedWord] = (frequencyMap[normalizedWord] ?? 0) + 1;
  });

  return Object.keys(frequencyMap).reduce(
    (a, b) => ((frequencyMap[a] || 0) > (frequencyMap[b] || 0) ? a : b),
    "",
  );
}
Test the API routem you can send a POST request to
http://localhost:3000/api/text-analysis.
# Start the app
pnpm run dev

# Send a POST request to the API route
curl -X POST http://localhost:3000/api/text-analysis -H "Content-Type: application/json" -d '{"text": "Hello, world!"}'
The response will look like this:
{
  "success": true,
  "data": {
    "id": "92z7ve",
    "timestamp": "2025-01-26T05:45:05.480Z",
    "analysis": {
      "wordCount": 2,
      "charCount": 13,
      "mostFrequentWord": "world",
      "sentimentScore": 0
    }
  }
}
Step 5: Creating a view for the text analysis app
With the API in place, let's build a user interface for the text analysis app.
We'll use the shared button, card, and textarea components.
Create a new view in the shared UI package:
import { useState } from "react";
import {
  Card,
  CardContent,
  CardHeader,
  CardTitle,
} from "@repo/ui/components/card";
import { Textarea } from "@repo/ui/components/textarea";
import { Button } from "@repo/ui/components/button";
import { TextAnalysisResult } from "../types/text-analysis.js";

function getSentimentText(score: number): string {
  if (score === 0) return "Neutral 😐";
  return score > 0 ? "Positive 🙂" : "Negative ☹️";
}

export const AnalyzeTextView = () => {
  const [sourceText, setSourceText] = useState("");
  const [isLoading, setIsLoading] = useState(false);
  const [result, setResult] = useState<TextAnalysisResult | null>(null);
  const apiBaseUrl = "http://localhost:3000";

  const handleSubmit = async (e: React.FormEvent) => {
    e.preventDefault();
    setIsLoading(true);
    try {
      const response = await fetch(`${apiBaseUrl}/api/text-analysis`, {
        method: "POST",
        headers: {
          "Content-Type": "application/json",
        },
        body: JSON.stringify({ text: sourceText }),
      });

      if (response.ok) {
        const data = await response.json();
        setResult(data.data);
      } else {
        console.error(response.statusText);
      }
    } catch (error) {
      console.error(error);
    } finally {
      setIsLoading(false);
    }
  };

  return (
    <div className="container mx-auto max-w-2xl p-4">
      <h1 className="mb-4 text-2xl font-bold">Text Analysis App</h1>
      <form onSubmit={handleSubmit} className="space-y-4">
        <Textarea
          value={sourceText}
          onChange={(e) => setSourceText(e.target.value)}
          placeholder="Enter your text here..."
          className="min-h-[100px]"
        />
        <Button type="submit" disabled={isLoading}>
          Analyze Text
        </Button>
      </form>

      {result && (
        <Card className="mt-8">
          <CardHeader>
            <CardTitle>Analysis Results</CardTitle>
          </CardHeader>
          <CardContent>
            <dl className="grid grid-cols-2 gap-4">
              <div>
                <dt className="font-semibold">Word Count:</dt>
                <dd>{result.analysis.wordCount}</dd>
              </div>
              <div>
                <dt className="font-semibold">Character Count:</dt>
                <dd>{result.analysis.charCount}</dd>
              </div>
              <div>
                <dt className="font-semibold">Most Frequent Word:</dt>
                <dd>{result.analysis.mostFrequentWord}</dd>
              </div>
              <div>
                <dt className="font-semibold">Sentiment Score:</dt>
                <dd>{getSentimentText(result.analysis.sentimentScore)}</dd>
              </div>
              <div className="col-span-2">
                <dt className="font-semibold">Timestamp:</dt>
                <dd>{new Date(result.timestamp).toLocaleString()}</dd>
              </div>
            </dl>
          </CardContent>
        </Card>
      )}
    </div>
  );
};
The AnalyzeTextView component provides a form for input and displays the analysis results once the API call completes. This component can be used across all platforms, ensuring a consistent user experience.
When running the app, you can navigate to http://localhost:3000/ to see the
text analysis view in action.

Native Apps: iOS and Android with Tauri
Setting up Tauri for mobile platforms requires some additional configuration. Ensure that you have Xcode installed for iOS development and Android Studio for Android development.
Tauri allowd you to call native APIs from your Rust code, which can be called
from your React components by using Tauri's invoke method. For example, to
return the device's platform:
use tauri::Manager;

#[tauri::command]
fn get_platform() -> String {
    #[cfg(target_os = "macos")]
    return "macOS".to_string();
    #[cfg(target_os = "ios")]
    return "iOS".to_string();
    #[cfg(target_os = "android")]
    return "Android".to_string();
    #[cfg(target_os = "windows")]
    return "Windows".to_string();
    #[cfg(target_os = "linux")]
    return "Linux".to_string();
    "Unknown".to_string()
}

fn main() {
    tauri::Builder::default()
        .invoke_handler(tauri::generate_handler![get_platform])
        .run(tauri::generate_context!())
        .expect("error while running tauri application");
}
In the React component, you can call the get_platform function using Tauri's invoke method:
import { useEffect, useState } from "react";
import { Button } from "@repo/ui/components/button";

export const PlatformView = () => {
  const [platform, setPlatform] = useState<string | null>(null);

  useEffect(() => {
    window.tauri
      .invoke("get_platform")
      .then((response) => setPlatform(response as string))
      .catch((error) => console.error(error));
  }, []);

  return (
    <div className="container mx-auto max-w-2xl p-4">
      <p>Platform: {platform}</p>
      <Button>Invoke Tauri</Button>
    </div>
  );
};
In our example app, we don't need to call native APIs. However, you can still run the app in development mode on iOS and Android devices using Tauri's CLI tools:
# Start the app in Android development mode
pnpm tauri android dev

# Start the app in iOS development mode
pnpm tauri ios dev
When running the app on an Android device, you'll see the following output:
Desktop Apps: Linux, macOS, and Windows with Tauri
For desktop apps, Tauri provides excellent cross-platform support. You may need to adjust platform-specific settings such as permissions or packaging configurations. Refer to Tauri's official guides for detailed instructions.
When running the app on a desktop platform, you'll see the following output:

Deployment
Deploying your app to various platforms is the final step in the development process. Here are some deployment options for each platform:
- Web: Use Vercel or a similar service to host your Next.js app.
- Mobile: Follow Tauri's mobile deployment guide to publish your app to the App Store and Google Play.
- Desktop: Build and package your Tauri app for Linux, macOS, and Windows using Tauri's CLI tools. Publish the app to platforms like the Microsoft Store or the Mac App Store.
Conclusion and Final Thoughts
This monorepo setup using Tauri and Next.js offers a robust solution for building cross-platform apps with a single codebase. By leveraging shared components and consistent architecture, you can ensure a seamless user experience across web, mobile, and desktop platforms.